
How to Crochet a Christmas Tree Ornament: Layered Festive Design
How a layered crochet Christmas tree ornament is built: a scalloped trim strip wound around a foam cone, a crochet star topper, and an honest look at what's verified and what isn't.
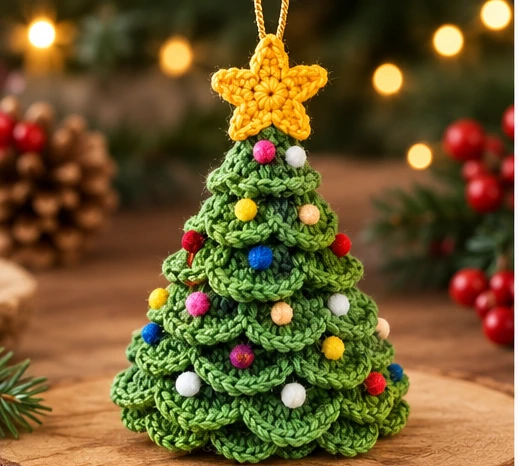
About this guide: The 11 "crochetsmith-*" images with this article are original CrochetSmith design illustrations—conceptual visuals, not photographs of a physically assembled, tested ornament. We also reviewed a third-party stitch-chart and assembly reference image while developing this project; that reference is not published here because its redistribution rights aren't confirmed, and we did not trace, recolor, or otherwise copy it. The stitch counts in the companion pattern were checked for internal arithmetic consistency and are published with a Draft status, per CrochetSmith's usual labeling for patterns that haven't been physically test-stitched yet. See the pattern page for exact stitch counts; this article is the narrative walkthrough.
A Handmade Christmas Tree Ornament
A layered crochet Christmas tree is one of those small projects that reads as far more complicated than it actually is. Underneath the fluffy, tiered look, it's built from one repeating stitch pattern worked into a long strip, wound around a simple cone shape, plus a handful of small separate pieces—a star, a hanging loop, a few embellishments. None of the individual pieces are difficult on their own. What makes the project feel special is how they come together: a dense, scalloped trim wrapped in overlapping bands up a cone, so the finished tree has real depth and texture rather than a flat, printed-looking surface.
This article walks through the design concept, the materials, and the construction logic in plain language. For the exact, numbered stitch counts, there's a companion pattern page—we're keeping the two separate rather than repeating (and risking contradicting) the same instructions in both places.
What Makes This Layered Crochet Tree Special?
Most crochet Christmas trees fall into one of two camps: a single cone-shaped piece worked in rounds of increasing single crochet (which looks neat but flat), or a tree built from graduated, separately stitched discs stacked and glued (which looks fuller, but means sewing or gluing several distinct pieces together cleanly). This design sits closer to the second camp, but simplifies the assembly: instead of several separate discs, it uses one long strip of a repeating shell stitch, wound in a spiral or in overlapping horizontal bands around a purchased foam cone. That means fewer separate pieces to keep track of, fewer joins, and a forgiving margin for error—if one band isn't perfectly even, the next band overlaps and covers it.
The trade-off, and we want to be upfront about it, is that the exact number of bands you'll need depends entirely on the size of cone you use. We haven't invented a fixed round-by-round count that claims to fit "a" cone in the abstract, because that number only means something once you've chosen a real one. The pattern gives you a mathematically consistent repeating stitch and tells you how to check your own fit as you go, rather than a number that looks precise but isn't actually verified against anything physical.
Materials and Tools
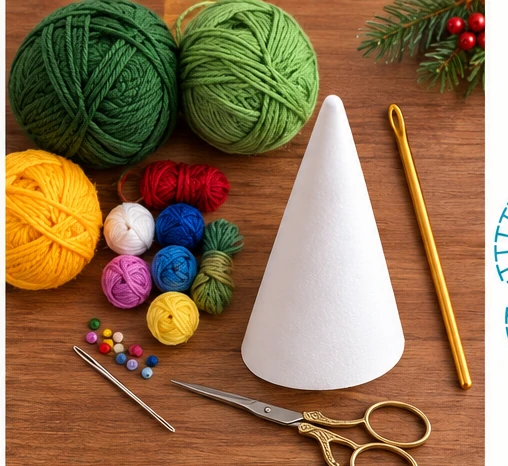
- Worsted weight (US #4) yarn in a forest or pine green, for the tree layers—exact amount depends on your cone size and how many bands you work, so start from a full skein and keep a second on hand
- A small amount of yellow or gold worsted weight yarn, for the star topper
- A purchased craft-foam or polystyrene cone, the kind sold in craft and hobby shops—a starting size of about 10 cm (4 in) tall is a reasonable size to try first, but any cone works; just expect to adjust the number of bands to match it
- A 4.0 mm (US G/6) crochet hook as a starting point—go up or down half a size depending on how your yarn behaves
- Tapestry needle and sharp scissors
- Fabric glue, or a sewing needle and thread, to secure the crocheted bands to the cone (both work; see the Assembly section for the trade-offs of each)
- A short length of cord, embroidery floss, or your working yarn, for the hanging loop
- Optional: small pom-poms, beads, or scraps of contrasting yarn for decorative accents
Small decorative accents (beads, mini pom-poms) are not secured firmly enough for this to double as a toy, and they're a choking hazard if they come loose. Keep finished ornaments like this away from young children, and don't market or gift a piece like this as something for a child to handle unsupervised.
Understanding the Scalloped Crochet Layers
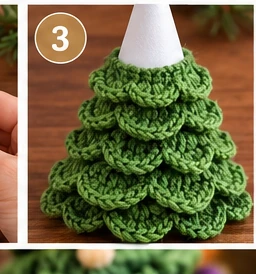
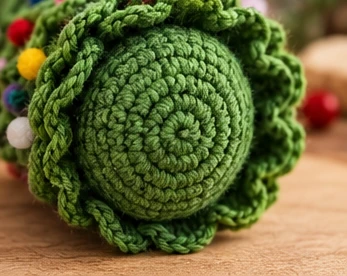
The "layers" you see in the finished tree aren't separate crocheted pieces. They're one continuous strip of a repeating shell stitch—a cluster of double crochets fanning out of a single stitch, alternating with small single-crochet anchors—wound around the cone so that each wrap overlaps the one below it by about a third. From a distance, the overlapping scallops read as distinct tiers, the way real shingles or feathers read as layers even though each row is just one continuous piece. This is also why the construction is forgiving: because each band covers the top of the one before it, small irregularities in tension or spacing get tucked under the next wrap rather than staying visible.
Choosing Yarn, Hook Size, and Colors
A smooth worsted weight cotton or acrylic shows the shell stitch's texture more clearly than a fuzzy or highly textured yarn, which tends to blur the scallops together. Stick to a firm, consistent tension—this project is wrapped around a solid form rather than worked to an exact finished measurement, so gauge in the usual sense (a specific stitch count per inch) matters less than simply keeping your stitches even from one end of the strip to the other. Work a short test length of the repeat first and see how it looks wrapped around your actual cone before committing to a full set of bands.
Classic forest green is the obvious choice, but there's no technical reason the trim has to be green: a white or cream trim reads as a snow-flocked tree, and a deep teal or burgundy makes an unconventional but striking ornament. The star topper and any accents are a simple place to introduce contrast color without changing the construction at all.
Preparing the Tree Foundation
The "foundation" here is literal: a purchased craft-foam cone, not a crocheted base. Using a solid form rather than crocheting a cone shape from scratch keeps the finished ornament sturdy and consistently shaped without relying on stuffing density or blocking to hold a cone silhouette, which is hard to get right and even harder to keep right once stitches are added on top. Before starting, check that your cone's base is trimmed flat so it will stand upright once finished, and decide now whether you'll secure the trim with fabric glue or by stitching through the foam with a needle and thread—see Assembly and Finishing below for how that choice affects the rest of the process.
Making the Graduated Crochet Layers
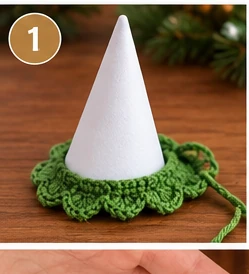
The repeating shell stitch that makes up every band is given in full, with its stitch counts and a divisibility check, on the pattern page. In short: you chain a length that's a multiple of 6 plus 2 stitches, then work a row of alternating shells (groups of double crochets) and small single-crochet anchors along it. Each band you make for a wider, lower part of the cone needs a longer starting chain than a band higher up, since the cone is wider at the bottom. Rather than inventing fixed chain lengths for an unspecified cone, the pattern has you chain to the length that wraps once around your cone at the height you're starting that band, keeping the chain a multiple of 6 plus 2 so the repeat still divides evenly.
Building the Tree Shape
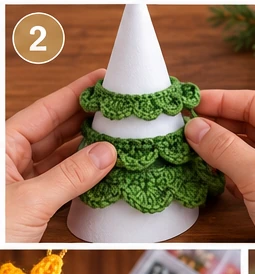
Work from the cone's base upward. Secure the first (longest) band around the base, then work and secure each following band a little higher up, overlapping the top edge of the previous band by roughly a third of its height, with the scalloped points facing downward like shingles. Keep going until you're close to the cone's point; the last band or two will be noticeably shorter than the first, since the cone narrows. For the very tip, a few single crochet stitches worked directly in a small ring (rather than a full shell band) gives a neater, less bulky finish than trying to wrap a full band around a very narrow point.
Creating the Star Topper
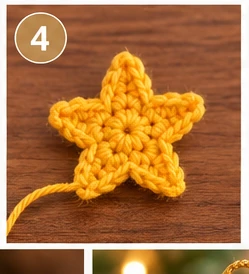
The star is worked flat, separately from the tree, and attached at the end. It starts as a small ring of single crochet, then five evenly spaced point clusters are worked around that ring, each joined to the next with a slip stitch so the points sit at consistent intervals. Because the ring's stitch count is evenly divisible by the number of points, the five clusters land at even spacing automatically—no measuring or guessing required, which is the kind of thing that's genuinely verifiable through arithmetic rather than through a physical test. Exact stitch counts for both rounds are on the pattern page.
Adding Decorative Accents
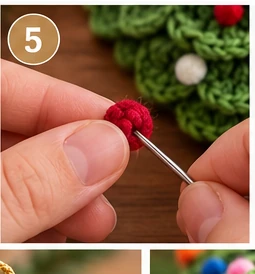
Small contrast-color French knots, tiny pom-poms, or beads tucked between the scallops read as ornaments on the tree without adding any construction complexity—they're embroidered or stitched on after the tree shape is built, not crocheted as part of any round. Space them out rather than clustering them, and stitch each one securely through to the foam underneath so nothing is held on by a single loose thread. As mentioned above, treat any small detachable piece like this as unsuitable for a young child to handle.
Assembly and Finishing
Two methods will hold the bands onto the cone, and we're presenting both rather than picking one and calling it settled, since we haven't tested either for long-term bond strength on this specific combination of yarn and foam:
- Fabric glue: faster, and holds the band flat against the foam without stitching through it. Run a thin line of glue along the cone where the band's straight top edge will sit, press the band on, and hold until tacky. Test on an offcut first—some fabric glues take longer to set on yarn than on fabric.
- Needle and thread: slower, but avoids introducing glue to an otherwise all-fiber object, and is easy to unpick and redo if a band ends up crooked. Whip-stitch along the band's straight top edge, catching a small amount of foam with each stitch.
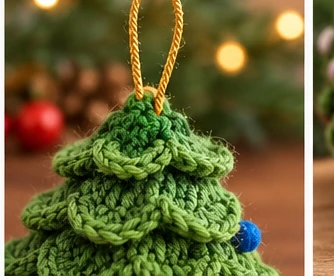
Once the last band is secured near the point and the tip is finished off, work the small flat base disc given in the pattern and glue or stitch it over the cone's raw bottom edge, so no foam or cut yarn ends show when the ornament is displayed. Attach the star to the very top, and add the hanging loop (a simple chained loop, also on the pattern page) right next to it, so both are secured through the same sturdy point.
Understanding the Crochet Chart
We reviewed a crochet chart reference while developing this project, but we don't have confirmed redistribution rights for it, so it isn't published here—and we didn't trace, recolor, or otherwise rework it into something we could present as our own. Instead, the diagram below is CrochetSmith's own original drawing, built directly from the stitch counts in the pattern page rather than copied from any outside source. It shows the trim's repeating row (the shell-and-anchor sequence described above) and the star's two rounds, with a symbol legend, numbered rows/rounds, and a marked starting point, matching the written instructions exactly.
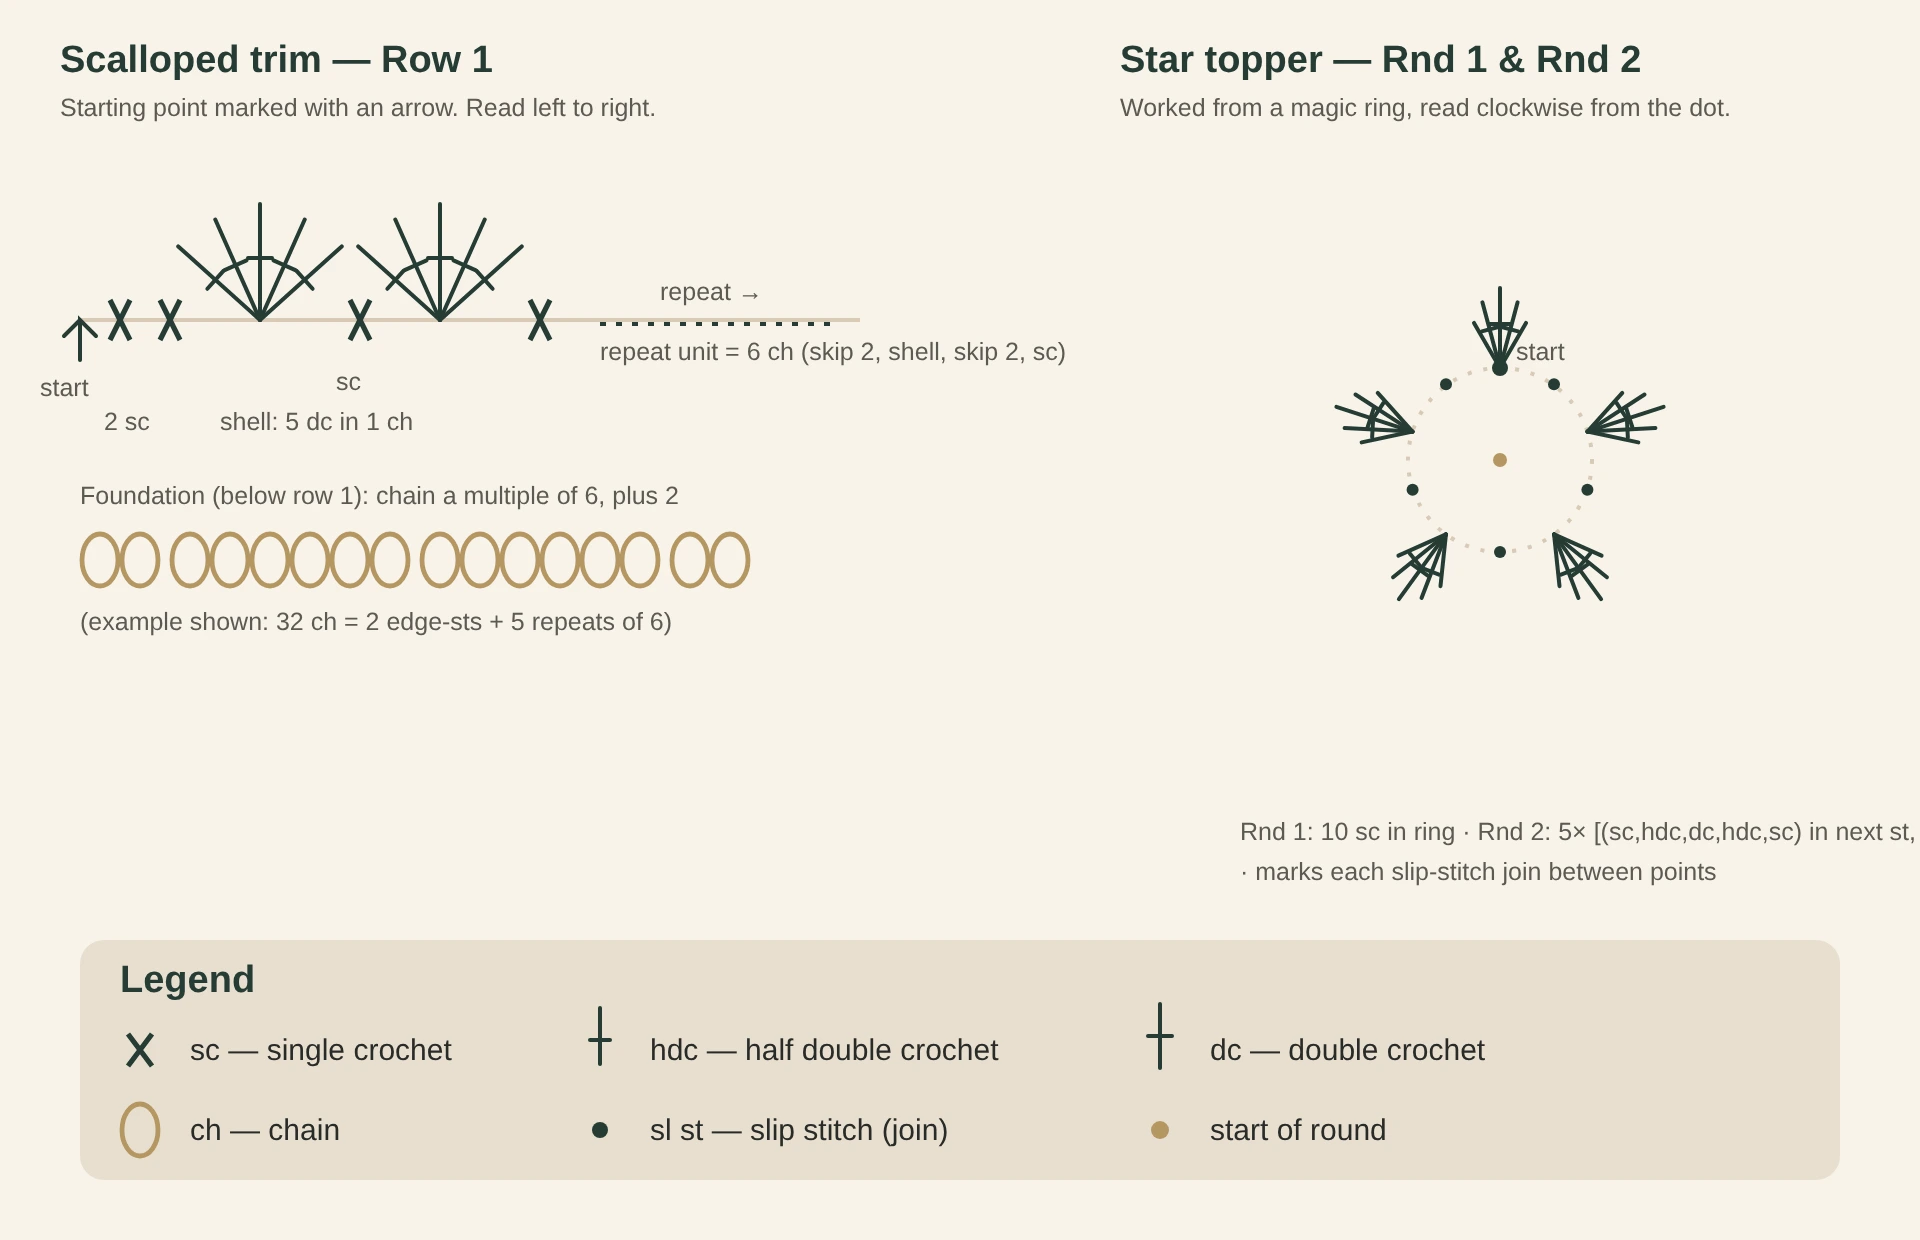
Reading either diagram is straightforward: start at the marked point and follow the symbols in order, left to right for the trim row, clockwise for the star. The legend translates each symbol to its US stitch abbreviation. As with the written pattern, this chart reflects arithmetic we've checked for consistency—it isn't a substitute for swatching the repeat yourself before committing to a full set of bands.
Common Problems and How to Fix Them
The trim band won't lie flat against the cone
This usually means the chain was worked a little too short or too long for that point on the cone's circumference. Because the repeat is a multiple of 6 plus 2, you can add or remove one full repeat (6 chains) and re-check the fit, rather than un-ravelling the whole band.
The shells look uneven from one repeat to the next
Each shell is 5 double crochets worked into a single chain stitch; if that chain stitch is stretched or split while you work into it, the shell on top of it can lean or gap. Working the shells a touch more snugly than feels natural, and keeping consistent tension on the working yarn, usually evens this out over the first couple of repeats.
Bands are slipping before the glue or stitching sets
Foam is slippery under tension. A couple of fine pins (the kind used for sewing, pushed straight into the foam) holding a band in place while glue sets, or while you work the whip stitches, solves this without damaging the yarn.
The star looks lopsided
Check that all 10 stitches from the first round were used evenly across the five point clusters in round 2—two stitches per point, no more, no less. An extra or missing stitch in one point is the most common cause of a star that leans to one side.
Creative Christmas Color Variations
Because the construction doesn't depend on the color at any step, this is an easy project to reinterpret: an all-white or cream trim with a silver star for a "snow tree" look; alternating two shades of green between bands for subtle depth; or a non-traditional palette entirely—deep red, navy, or blush pink trim with a gold star reads more like a modern decorative object than a literal Christmas tree, and works well outside the holiday season too.
Care and Storage
Keep finished ornaments away from open flames and direct heat sources—yarn and foam are both flammable, and we're not making any claim about how either material performs near heat, so the safest approach is simply to keep this kind of decoration well away from candles, fireplaces, and radiators. Store it in a box or soft pouch rather than loose in a bin with heavier decorations, since the trim bands can flatten or snag under pressure. A light fluff with your fingers after storage usually restores the scalloped texture.
Frequently Asked Questions
Is this a tested, guaranteed pattern? No. It's published as a Draft pattern on CrochetSmith, meaning the stitch counts were checked for internal consistency but the full ornament hasn't been physically assembled and verified by us yet. Swatch the trim repeat and test it against your own cone before committing to a full project.
Can I use a crocheted cone instead of a purchased foam one? You could, but we haven't developed or checked stitch counts for a crocheted cone base as part of this project, so that would be your own independent adaptation rather than something covered here.
Do I need the original reference chart to make this? No. Everything needed to make this project is in the written pattern and the original CrochetSmith chart above; the third-party reference was used only to understand the general design concept during development.
How many trim bands will I need? It depends on your cone's height and how much overlap you leave between bands—there's no single correct number, since it varies with the cone you use.
Is this suitable for a beginner? The individual stitches (chain, single crochet, double crochet, slip stitch) are beginner-level. The part that benefits from some prior experience is working the shell stitch at a consistent tension and judging the fit of each band as you go.
Can I skip the foam cone and just stuff the tree instead? That would need a different construction (a crocheted cone shape worked in rounds, stuffed, with the trim added on top) and different stitch counts than the ones developed here, so we'd treat that as a separate project rather than a drop-in substitution.
Final Thoughts
This project is a good example of a technique that's more valuable than any single pattern: once you understand the repeating shell-and-anchor trim and how overlapping bands build visual depth, you can apply it at other scales or on other base shapes, not just this one ornament. For more on the stitches used here, see our guides to single crochet, increases and decreases, and how to read a crochet pattern. If you're building out a set of handmade holiday décor, our Santa Claus crochet ornament guide makes a good companion piece, and our Stacked Coaster Set is a simple next project if you'd like more practice with flat circles before tackling layered shapes.