
Santa Claus Crochet Ornament: Materials, Construction & Christmas Decorating Guide
A step-by-step design guide to a handmade crochet Santa ornament, with materials, construction notes, and honest guidance on tested vs. unverified steps.
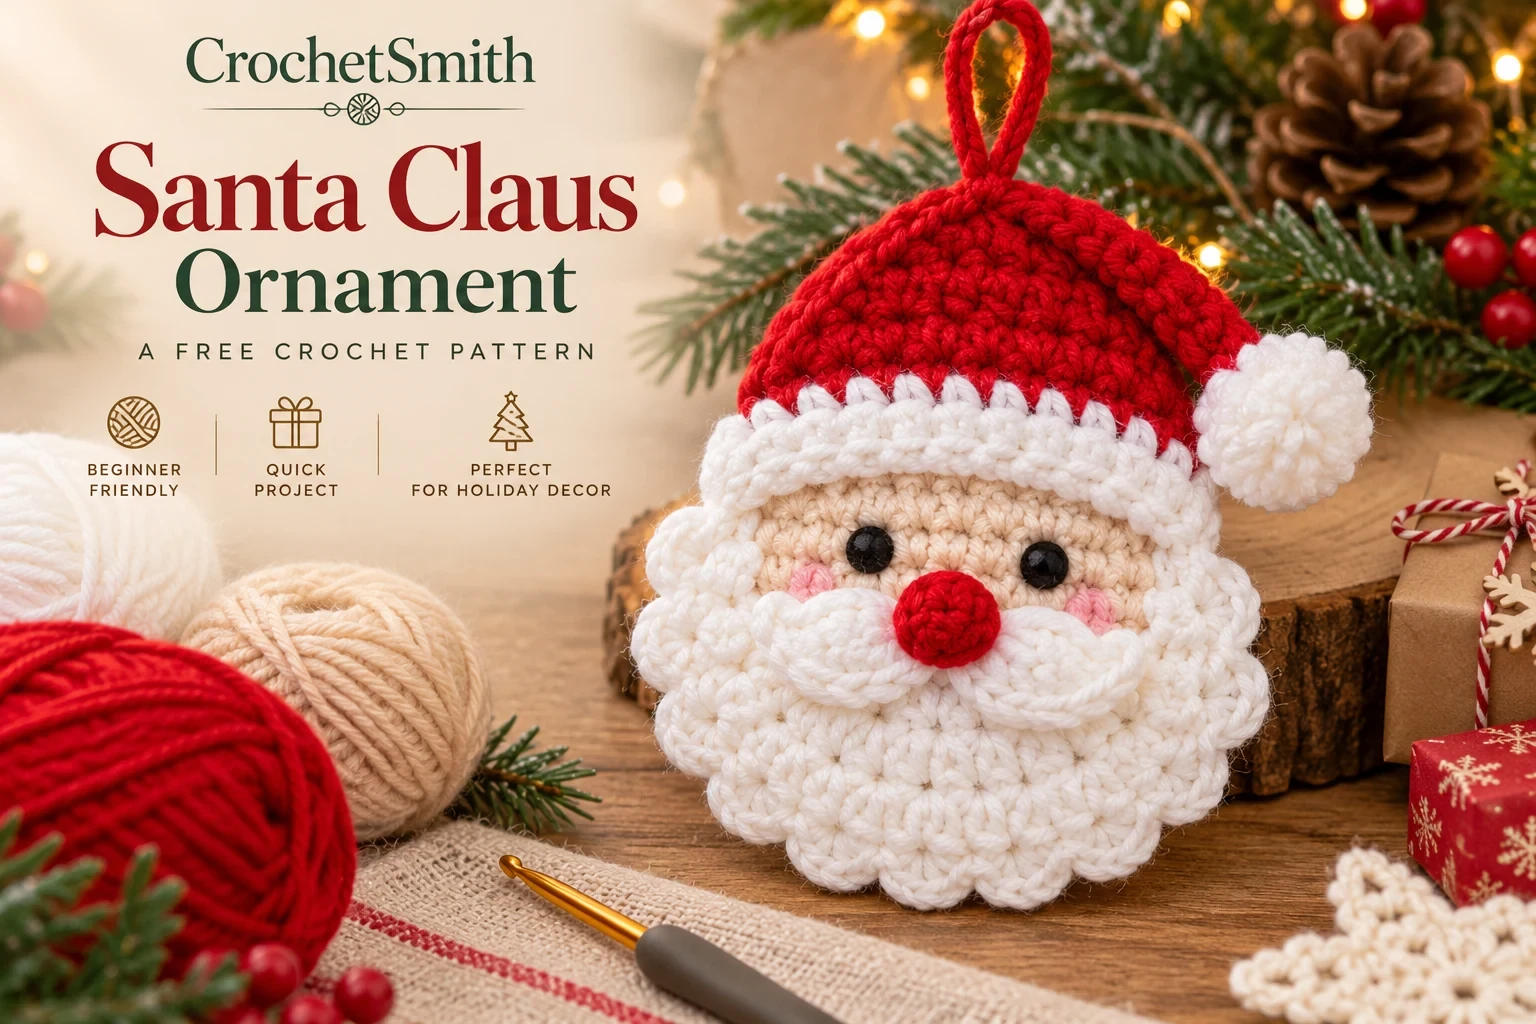
A Santa Claus face, worked flat in crochet and finished with a red hanging loop, is one of the small, satisfying projects that make a Christmas tree or a gift tag feel handmade. This guide walks through a complete design concept for a crochet Santa ornament—his round beige face, pointed red hat, fluffy white beard, and tiny embroidered details—built from separate, simple pieces that come together at the end.
This is a construction and design guide, not a finished, row-by-row pattern that has already been crocheted and verified by CrochetSmith. We'll walk through a prototype set of stitch counts, check that the arithmetic is internally consistent, and be upfront about exactly which parts are mathematically verified and which parts still need a swatch, a test piece, and your own judgment before you'd call them a tested pattern.
About this guide: The three images with this article are original CrochetSmith design illustrations, not photographs of a physically completed, tested ornament. The hero image above carries “A Free Crochet Pattern” and “Beginner Friendly” text as part of the supplied artwork itself—that wording is decorative, not a CrochetSmith claim that this is a tested, verified pattern. A preliminary stitch-count plan was reviewed for internal arithmetic consistency, but stitch counts alone don't establish real-world fit, gauge, or a guaranteed finished result. Swatch, test, and adjust before treating any of this as a finished pattern.
Design Overview
The ornament is built from five separate pieces, worked individually and then assembled: a flat beige face circle, a red triangular hat with a white trim band, a white beard worked around the lower edge of the face, two small white mustache pieces, and a small red nose. The eyes and rosy cheeks are added afterward with embroidery rather than crochet, and a chained loop at the top of the hat turns the finished face into a hangable ornament.
Working each piece on its own, rather than trying to shape the whole face in one continuous round, keeps the project approachable: you can set the hat aside and come back to the beard, or make a few spare noses while you decide on the exact shade of red you like best.
Materials and Tools
You'll need worsted-weight yarn in three colors—red for the hat, white for the beard and trim, and beige (or a similar skin-tone shade) for the face—plus a small amount of red for the nose. A crochet hook sized to your yarn (check the yarn label as a starting point, then swatch), a yarn or tapestry needle for assembly and embroidery, sharp scissors, and a small amount of polyester stuffing if you want a slightly raised nose are the only tools this project calls for.
For the eyes, you can use small safety eyes or embroider them with black yarn or embroidery floss. If the ornament may end up anywhere near a young child, embroidered eyes avoid a small, detachable plastic part; see the safety note in Facial Details below either way.
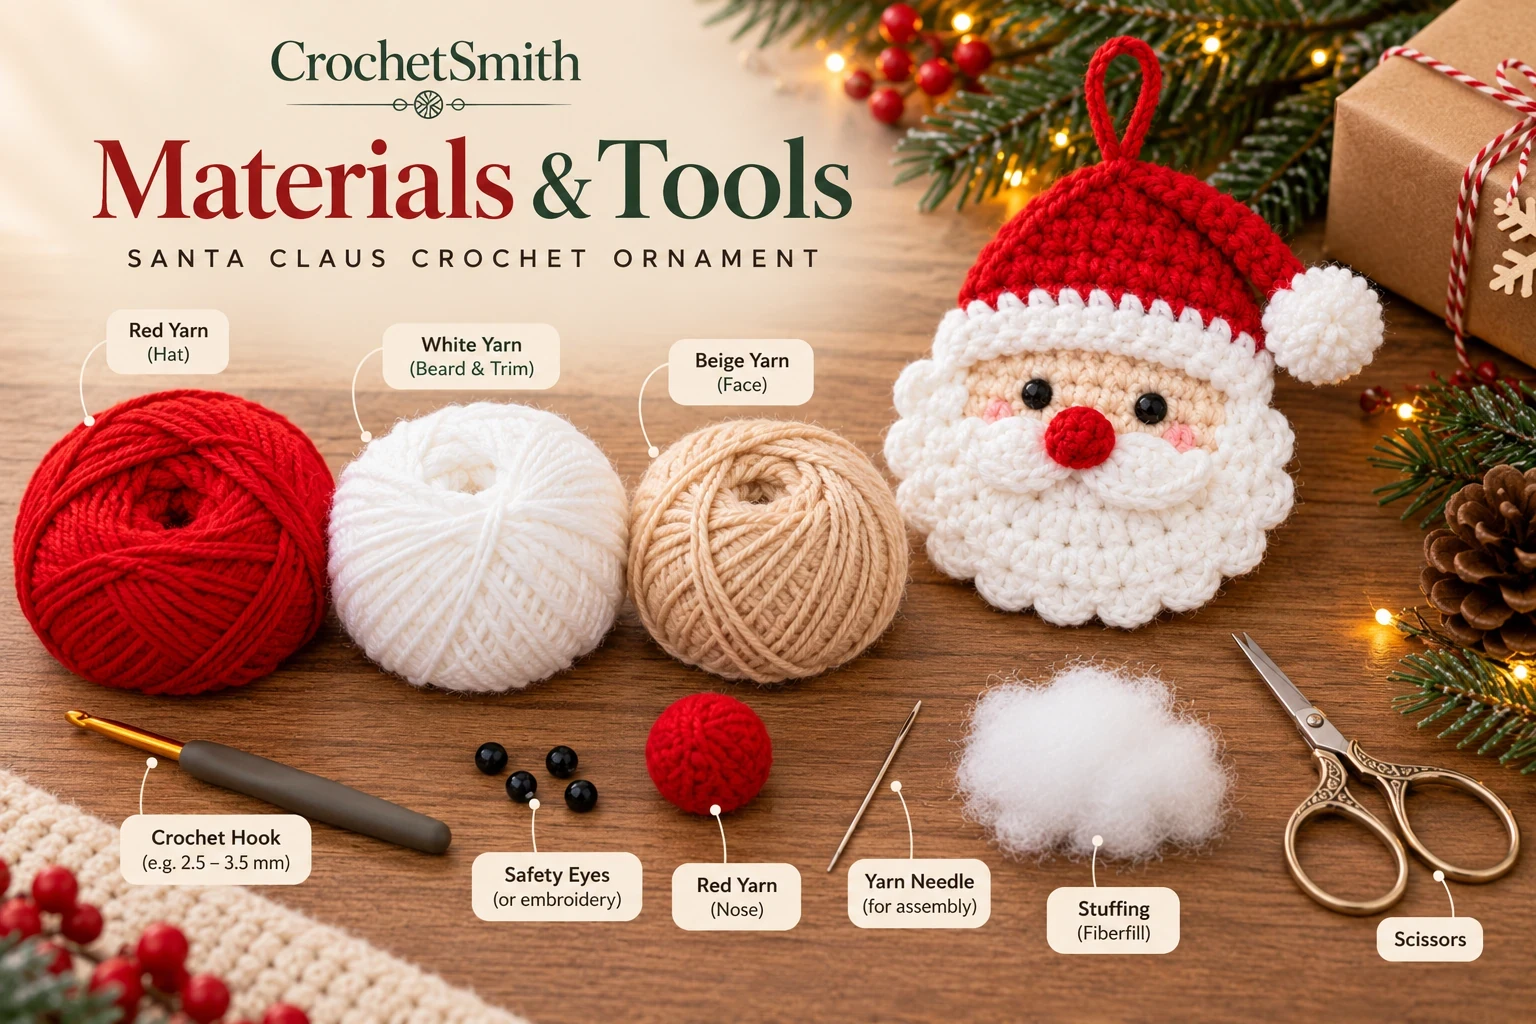
For background on yarn weights and hook sizing, see CrochetSmith's guides to yarn weights and choosing a crochet hook, and the essential notions kit for the small tools above.
Understanding the Construction
It helps to think of this project in two layers. The first layer is flat crocheted shapes: the face circle, the hat triangle, and the beard, each built by increasing stitch counts round by round or row by row. The second layer is assembled embellishments: the mustache, the nose, and the embroidered eyes, which are smaller pieces or details added on top of the finished shapes rather than grown from a stitch count of their own.
Working through the proposed stitch counts for the first layer, here's what we can actually verify, and what we can't, from arithmetic alone.
Face Foundation
The face is planned as a flat circle worked in single crochet, increasing from 6 stitches in the first round to 48 stitches by round 8. Checked as pure arithmetic, that's internally consistent: a standard flat-circle increase of 6 stitches every round (6, 12, 18, 24, 30, 36, 42, 48) reaches exactly 48 stitches at round 8, with no gaps or unexplained jumps. This is the same increase pattern used for many flat amigurumi circles, so the progression itself is a familiar, workable one.
What stitch counts alone can't tell you is the actual size of the finished circle in inches or centimeters—that depends on your yarn weight, hook size, and personal tension, none of which were specified. Work a test circle first and measure it before planning how the hat and beard need to fit around it.
Santa Hat
The hat is planned separately from the face, as a red triangle increasing from 2 stitches to 16 stitches over 15 rows, topped with a 16-stitch white trim band. The stitch math here is also internally consistent on its own terms: going from 2 to 16 stitches over 15 rows works out to an average of exactly one extra stitch per row, and the white trim's 16 stitches match the hat's final row count, so the trim should sit flush against the hat's base edge without you needing to add or skip stitches to make it fit.
What isn't verified is whether a hat built this way—increasing quite gradually, one stitch per row—ends up wide enough at its base to sit comfortably across the top of a 48-stitch face circle. That relationship depends on the actual stitch gauge of both pieces, which the prototype notes don't establish. Pin the two pieces together before sewing to check the proportions look right for your yarn before committing.
A small white pom-pom at the hat's point is optional and purely decorative—it isn't load-bearing and doesn't need to match any stitch count.
Beard and Mustache
This is the part of the prototype notes we'd flag most clearly as unresolved. The notes describe "a white circular beard foundation, increasing from 6 to 30 stitches"—arithmetic that is, again, internally consistent as a standalone circle (6, 12, 18, 24, 30 across 5 rounds, using the same increase-by-6 pattern as the face). But the step-by-step illustration with this article appears to show the beard's scalloped texture worked directly around the lower edge of the already-joined face-and-hat piece, rather than as a fully separate circle sewn on afterward. Both approaches are plausible ways to build a beard like this, and the supplied notes don't make clear which one was actually intended, so we're presenting it here as an open design decision rather than resolving it ourselves: you can work the scallop trim as an edging directly into the lower stitches of the finished face, or crochet a separate shaped piece and seam it on, whichever gives you a cleaner result with your yarn and hook.
The two mustache pieces and their shaping aren't specified in the prototype notes at all—no stitch counts were given for them. Small curved pieces, worked as a short row or two of single crochet and shaped with a loose slip stitch along one edge, are a reasonable starting point, but treat the exact shaping as something to design and test yourself rather than a verified count.
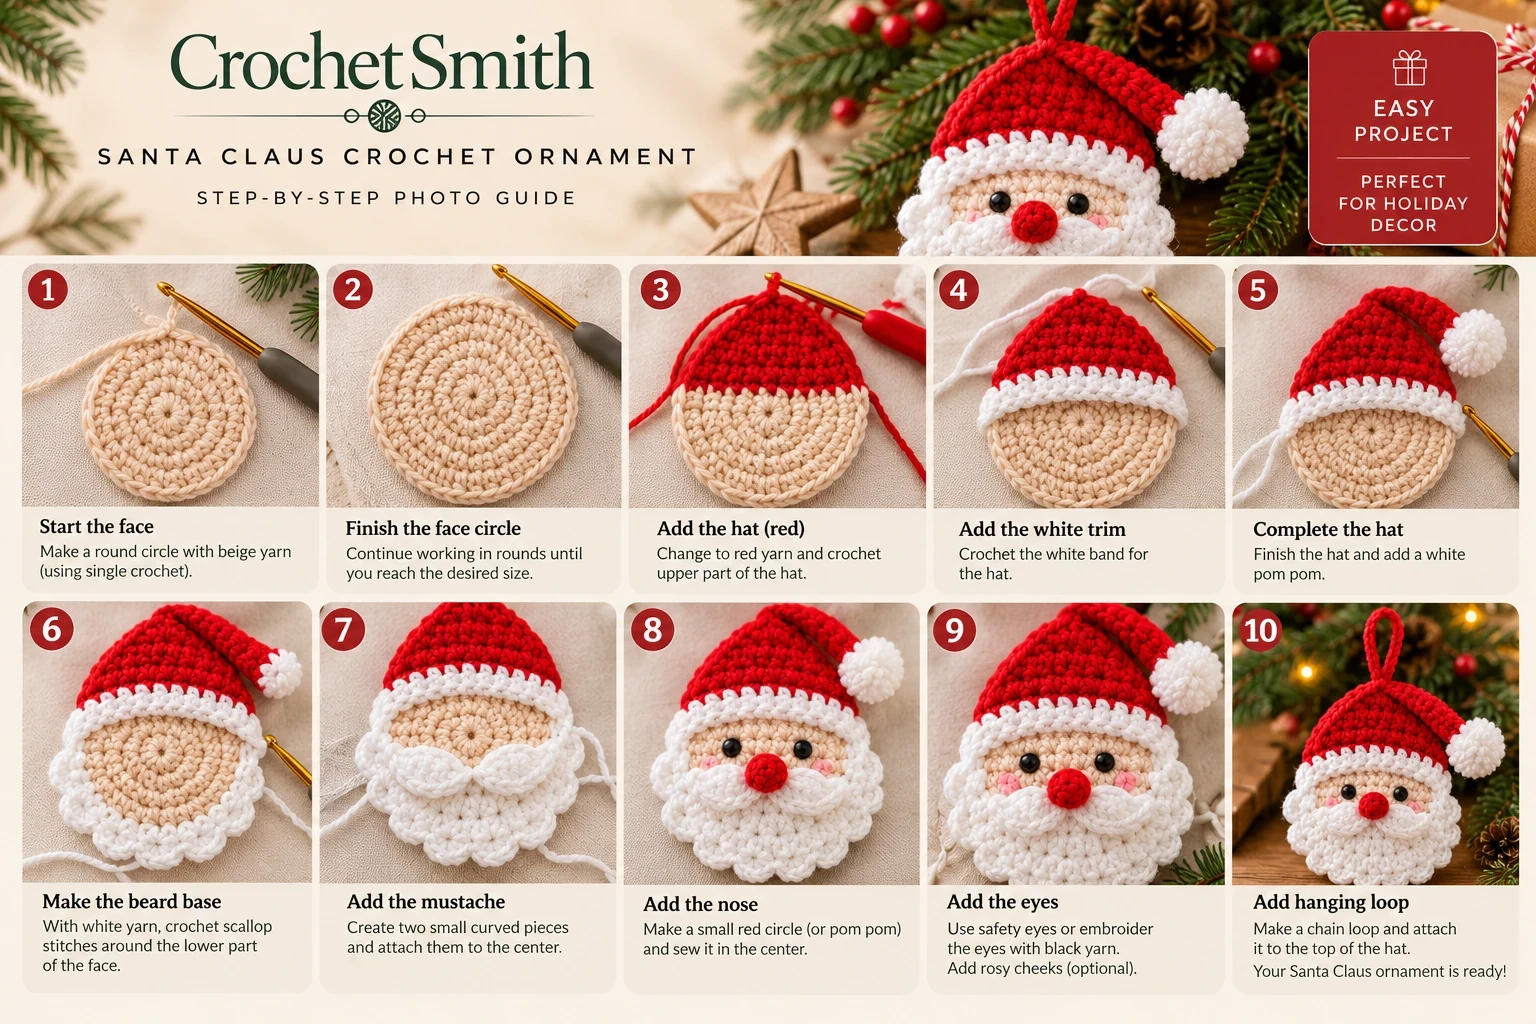
A note on that image: it illustrates a conceptual ten-step build sequence, not photographs documenting a physically completed, tested process. The "Easy Project" badge is part of the supplied artwork, not a CrochetSmith difficulty rating—see Troubleshooting below for the kinds of issues that can come up in practice. Treat the sequence as a visual guide to the general order of construction, not a stitch-by-stitch tutorial with confirmed row counts.
Facial Details
The nose is a small red crocheted circle or pom-pom, sewn onto the center of the face above where the beard and mustache meet. No stitch count was specified for it either; a few rounds of single crochet increasing gently, or a wrapped pom-pom, both work well at this scale—test against your face piece before committing to a size.
For the eyes, embroidering two small stitches with black yarn avoids adding any small, detachable hardware to the piece. If you do use plastic safety eyes, keep in mind that "safety eyes" are not automatically appropriate for babies or young children; a backed, securely washered eye is more secure than a loose shank, but embroidery removes the question entirely. Optional rosy cheeks, embroidered or lightly blushed with a touch of color, are a nice finishing touch and have no safety consideration either way.
Assembly and Hanging Loop
Lay the pieces out on the finished face before sewing anything, and check the overall proportions: hat centered and sitting level, beard positioned so the face shows through evenly above it, mustache pieces meeting near the center, and the nose placed where the mustache pieces come together. Small adjustments are much easier to make before anything is sewn down.
Sew each piece on with matching or near-invisible thread, working from the largest pieces (hat, beard) to the smallest (mustache, nose), and weave in yarn ends securely as you go rather than leaving them for the end. For the hanging loop, a simple chain of 8–12 stitches, slip-stitched into a loop and attached securely at the top point of the hat, is a straightforward finish—adjust the chain length so the loop is large enough for a ribbon or ornament hook to pass through comfortably.
Personalization Ideas
Once the basic shapes are familiar, there's a lot of room to make the design your own. Swap the hat and trim colors for a different holiday palette, add a tiny crocheted holly leaf or button instead of a pom-pom, or work the beard in a fuzzy or bouclé yarn for extra texture against a smooth face. A set of ornaments in slightly different beard shapes or expressions makes a nice handmade gift, individually or strung together as a garland.
Troubleshooting
The face circle won't lie flat
A circle that cups or ruffles usually means the increase rate doesn't match your tension with this particular yarn and hook. Check your increase placement is evenly spaced around each round, and consider a slightly larger or smaller hook if the problem persists.
The hat and face don't line up
Since the two pieces are planned with different stitch counts and no shared gauge was established, some mismatch is possible. Pin before sewing, and ease slightly fuller fabric to fit rather than stretching a piece that's too small.
The beard or mustache feels loose after sewing
Secure embellishments with several small stitches at multiple points around their edge rather than just a few tacking stitches, especially at the center where little fingers (or gift-wrapping) tend to tug.
Tension looks inconsistent across pieces
It's common for tension to drift between separately worked pieces made in different sessions. A quick warm-up round or two before starting a new piece can help you settle back into a consistent gauge.
Frequently Asked Questions
Is this a tested, guaranteed beginner pattern?
No. This is a design and construction guide built around a prototype stitch-count plan that we've checked for internal arithmetic consistency, not a physically completed and verified pattern. Treat the counts as a starting point to test, not a guarantee.
What size will the finished ornament be?
That depends entirely on your yarn weight, hook size, and tension, none of which are fixed here. Work a test face circle and measure it before deciding whether the overall proportions suit how you plan to use the ornament.
Do I need to crochet the beard as a separate piece?
Not necessarily. As explained in Beard and Mustache above, the construction notes are ambiguous on this point; working the scalloped edge directly into the face's lower stitches, or as a separate piece sewn on afterward, are both reasonable approaches.
Can I use safety eyes instead of embroidery?
You can, but embroidered eyes avoid adding a small, detachable part, which matters if the ornament might end up within reach of a young child. See Facial Details above.
Is this listed as a free crochet pattern?
No. Because several elements—yarn weight, hook size, gauge, and the mustache and nose shaping—aren't fully specified, we're presenting this as an editorial construction guide rather than a complete, reproducible pattern.
Can I turn this into a garland or gift tag instead of a tree ornament?
Yes—the same face, worked at a smaller scale or without a hanging loop, works well as a gift tag, and several faces strung together on a cord make a simple garland.
Final Thoughts
A crochet Santa ornament is a genuinely approachable holiday project once you break it into its separate pieces: a face, a hat, a beard, and a handful of small details. The stitch-count plan behind this guide checks out as consistent arithmetic, but turning any set of numbers into a finished ornament still takes a swatch, some test pieces, and your own eye for proportion—exactly the kind of honest groundwork we'd want before calling anything a finished pattern.
If you'd like to brush up on the basics first, CrochetSmith's guides to single crochet, increases and decreases, and how to read a crochet pattern are a good place to start. For two more handmade pieces to try next, see our guides to the crochet owl basket and the crochet bear yarn basket.