
Crochet Bear Yarn Basket: Wooden Base, Materials & Assembly Guide
Explore how to make a crochet bear yarn basket with a wooden base, practical materials guidance, assembly order, and styling ideas for your craft space.
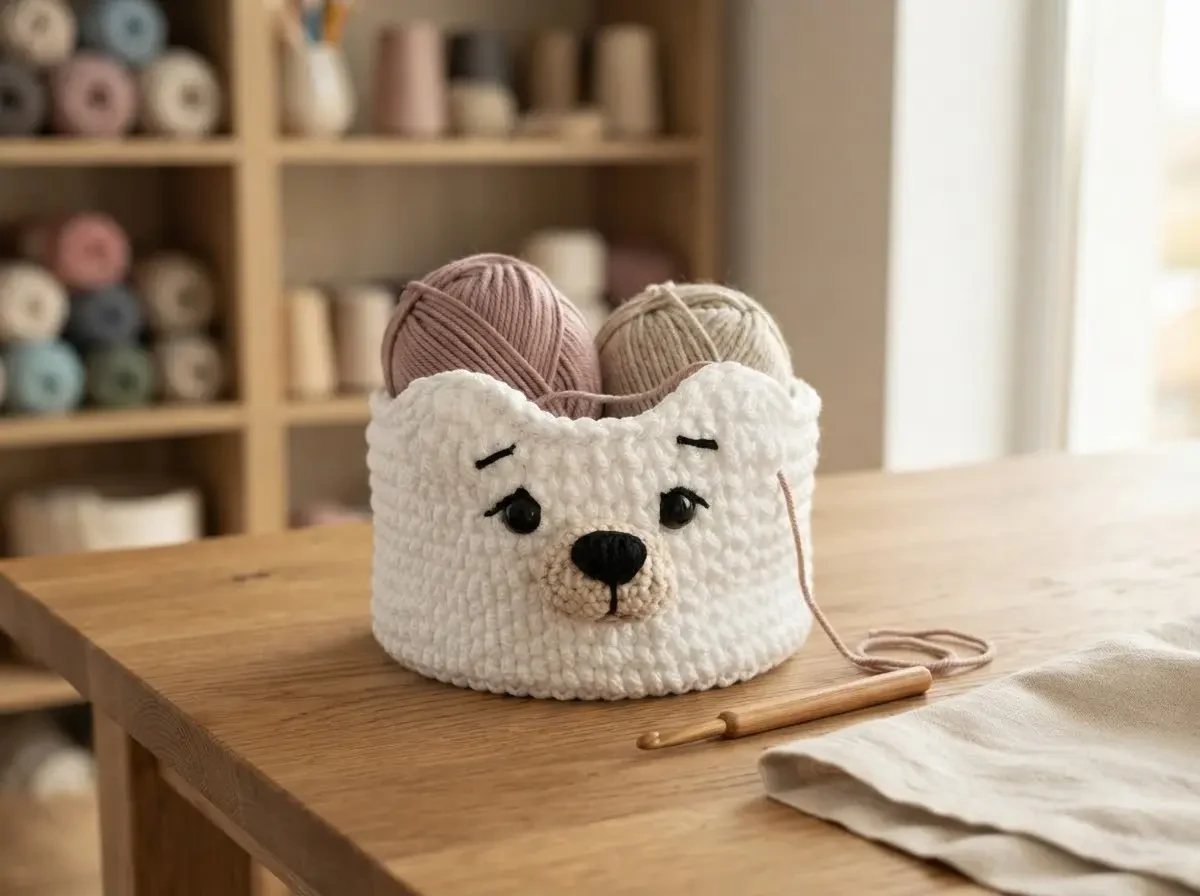
A ball of yarn has a way of wandering across the table at exactly the wrong moment. A yarn basket gives it a home—and a basket with a little bear face can make the whole craft corner feel more inviting.
This project concept combines a round wooden base, crocheted sidewalls, a small yarn-feed opening, and playful bear features. The wooden base offers a defined starting shape; the crochet gives the basket its soft, handmade character. A rounded muzzle and ears transform a functional organizer into a decorative companion for your next project.
In this guide, we'll look at the construction decisions behind a bear-inspired yarn basket: what to check when selecting a pre-drilled wooden base, how the first crochet round relates to the holes, how to keep the walls even, and how to plan the face without compromising the basket's function.
About this guide: This is an original educational overview, not a tested stitch-by-stitch pattern. The third-party reference includes a specific maker's construction and measurements, but CrochetSmith has not independently tested them. Do not treat the images or the example specifications as a verified CrochetSmith pattern.
What Makes a Bear Yarn Basket Different?
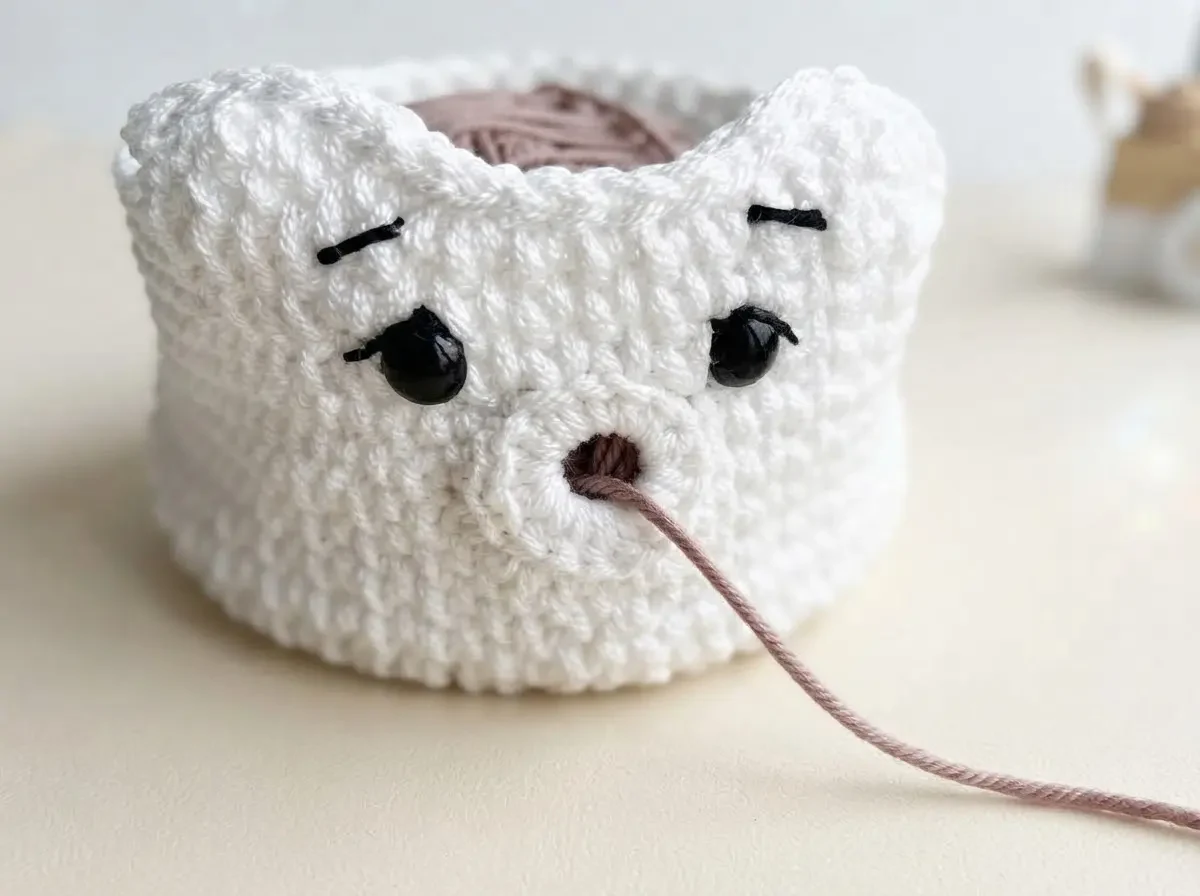
Unlike a closed amigurumi toy, this bear has an open top and a useful interior. It can hold a ball or cake of yarn while you work, with a strand exiting through a dedicated opening in the wall. The bear's face is a decorative feature on the outside, not a structural part of the storage compartment.
The design can be understood as five parts: a rigid circular base, a firm crocheted wall, a carefully finished top edge, a yarn-feed opening, and separately made facial details. Each part has its own job. Thinking about them separately makes the project easier to plan and troubleshoot.
The basket is best considered a lightweight desktop organizer rather than a bag or load-bearing container. A wooden base may be rigid, but that does not make the attached crochet suitable for carrying heavy objects.
The Wooden Base: What to Look For
A pre-drilled wooden base can simplify the bottom of a crochet basket. Rather than crocheting an expanding circle, the maker attaches the first round of stitches to holes around a finished disk. The disk establishes the footprint, while the yarn forms the walls above it.
The reference project identifies a 15 cm wooden base with 36 holes. Those are reference-specific details, not a universal requirement or independently verified instructions for this article. Different commercially available bases have different diameters, hole counts, hole spacing, and edge thicknesses.
When choosing a base, inspect the finish carefully. The wood should be smooth, with no splinters or sharp edges where the yarn passes through. Holes should be large enough for the chosen yarn and hook to pass without abrasion. Even spacing helps the first round look regular, but the correct stitch distribution depends on the actual base and yarn.
Materials and Tools to Consider
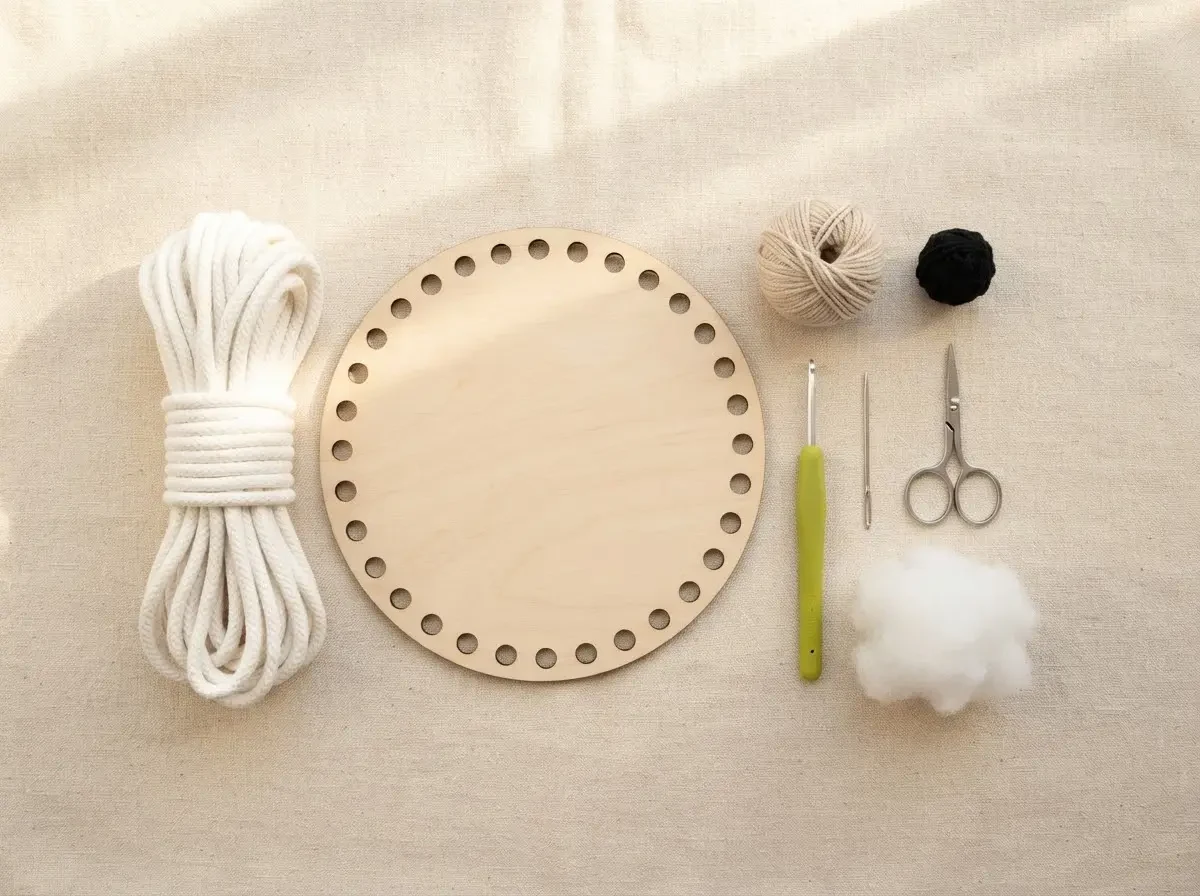
A firm, substantial yarn or crochet cord is useful for creating walls that stand upright. In the third-party reference, the maker names Caramel Dolce cord for the body and YarnArt Jeans for facial accents, alongside a 5 mm hook. These are details of that source, not CrochetSmith-tested recommendations or proof that a particular substitute will behave identically.
A practical materials checklist for planning your own version includes:
- A smooth, pre-drilled round wooden basket base.
- Firm yarn or cord for the basket body.
- A suitable hook that works comfortably with both the yarn and base holes.
- Contrasting yarn for the muzzle, ears, and embroidered details.
- A yarn needle, stitch markers, scissors, and measuring tape.
- Optional small quantities of stuffing for a raised muzzle.
The reference also shows plastic safety eyes. For a basket that may be handled by children, embroidered facial features avoid detachable plastic parts; even so, the whole object should not be presented as a child-safe toy without appropriate design and safety testing.
Before starting, test the yarn with the actual base. Check whether the hook can reach through the holes and whether the cord rubs against their edges. A beautiful yarn is not useful here if it cannot be worked through the base cleanly.
Attaching Crochet to a Pre-Drilled Base
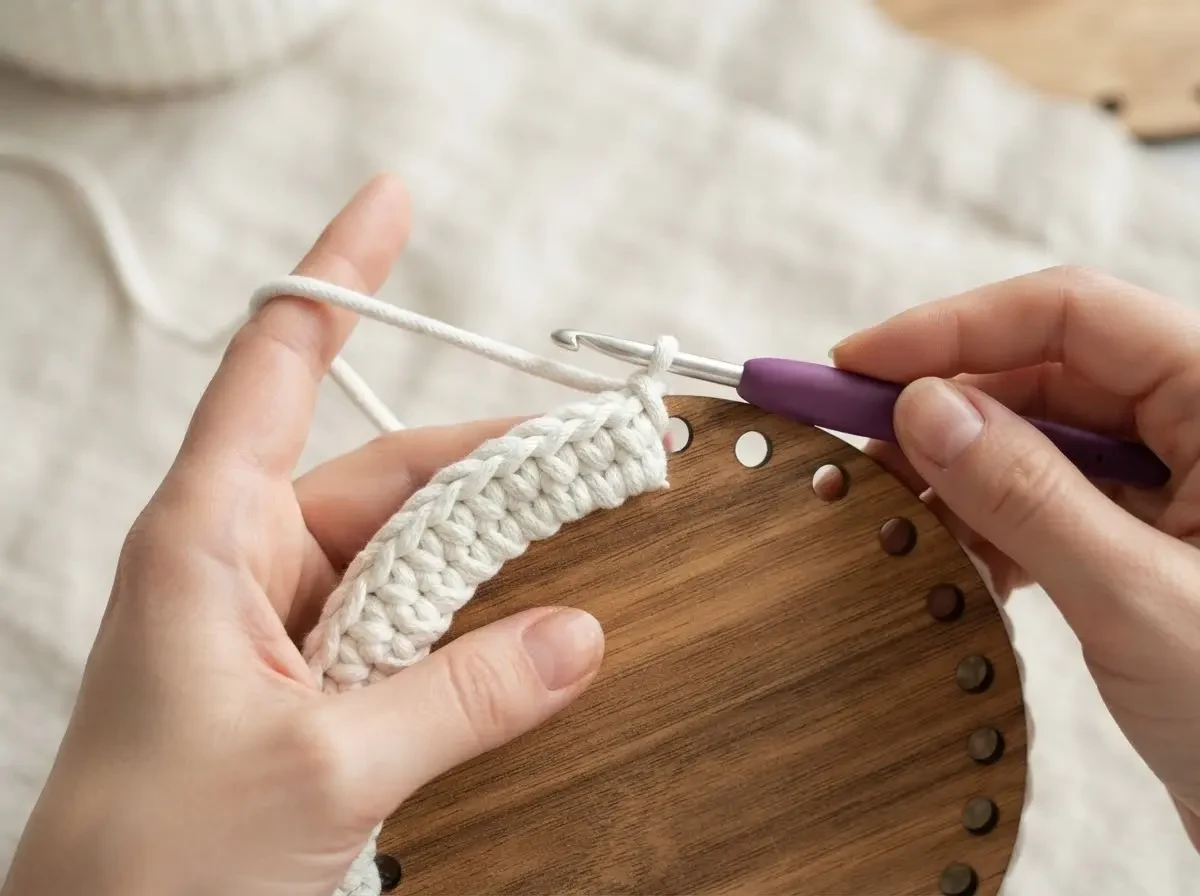
The first round is the foundation of the entire basket. In principle, the yarn is worked through the perimeter holes to connect the crocheted fabric to the wood. The tension needs to be consistent: too tight and the edge may pucker or stress the holes; too loose and the first round may look uneven or leave gaps.
Hole spacing matters. A particular base might require more than one stitch at some attachment points or a different transition into the sidewalls, but the correct approach cannot be assumed from photographs alone. Work a small trial section and assess how the stitches sit before continuing around the entire disk.
Keep the working yarn from snagging against unfinished wood. After completing the attachment round, inspect both sides of the base. The yarn should be secure, with no loose loops that catch easily on a tabletop.
Building Even, Upright Walls
Once the base is attached, the basket walls rise from the perimeter. Compact stitches help create a defined silhouette, although firmness depends on yarn, hook size, and tension together. Single crochet is a useful stitch to explore for a dense fabric; other textured stitches may also be suitable after testing.
The biggest challenge is keeping the circumference consistent. Unexpected increases can make the wall flare; missed stitches can make it narrow. Check the shape periodically from the side, not just from above. The base should remain level while the wall rises evenly around it.
Height is another design decision. A low basket can feel stable and make it easy to access the yarn. A taller basket may hold more, but it also asks more of the fabric's structure. Choose the height according to the intended yarn ball and the firmness of the crocheted wall.
Planning a Useful Yarn-Feed Opening
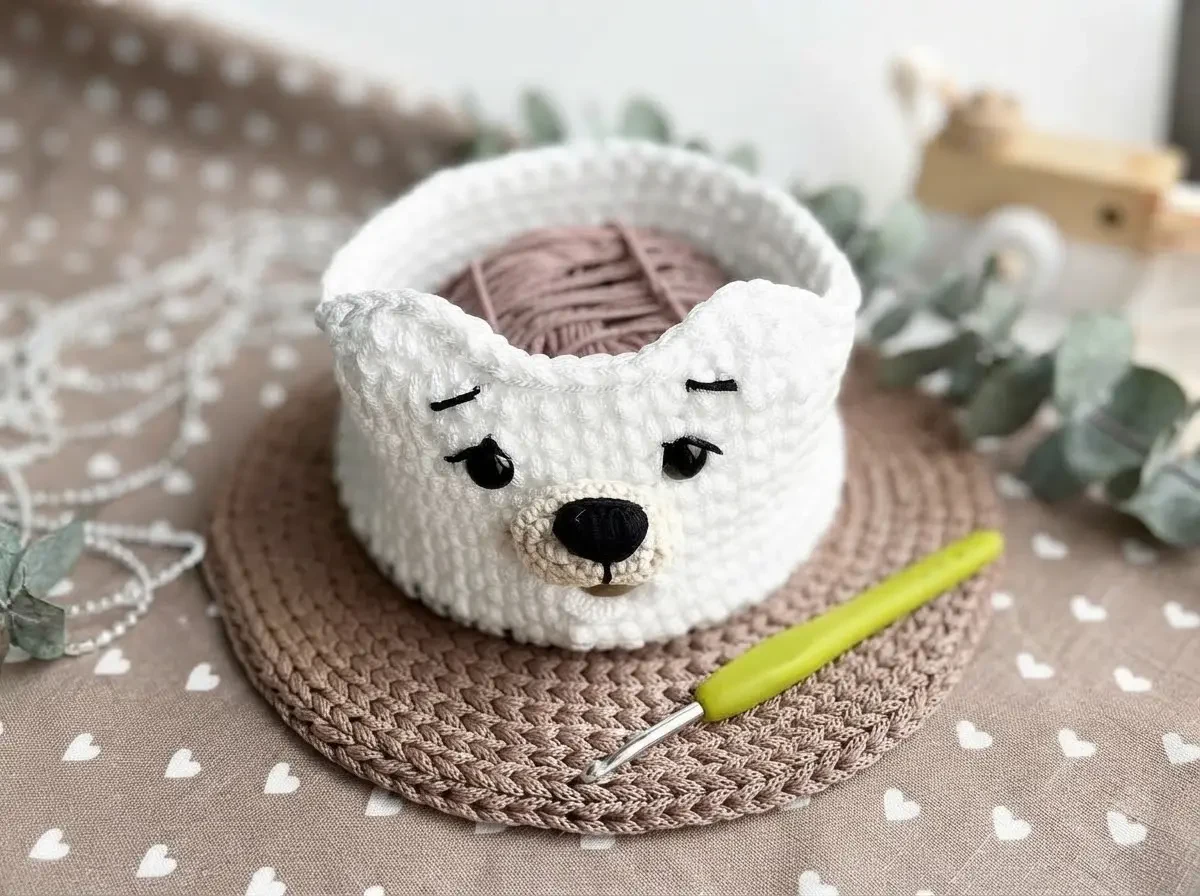
The opening is what turns a decorative basket into a practical yarn holder. Its purpose is to let the working strand leave the container without forcing the entire yarn ball to roll across the table.
Position matters. An opening that is too low may cause the yarn to rub against the base or pull at an awkward angle. One that is too high may not guide the strand effectively. The best location depends on the basket's height, the yarn being used, and how the basket will sit during crafting.
Whatever shape you choose, finish its edges neatly. The yarn should slide without catching on rough stitches or exposed wood. Test with the type of yarn you expect to store inside. Do not assume that one opening will suit every yarn thickness or texture.
A practical consideration: if the strand cannot be removed without cutting it, the opening may be inconvenient when switching projects. Consider this usability trade-off before deciding on the final construction.
Designing the Bear's Face
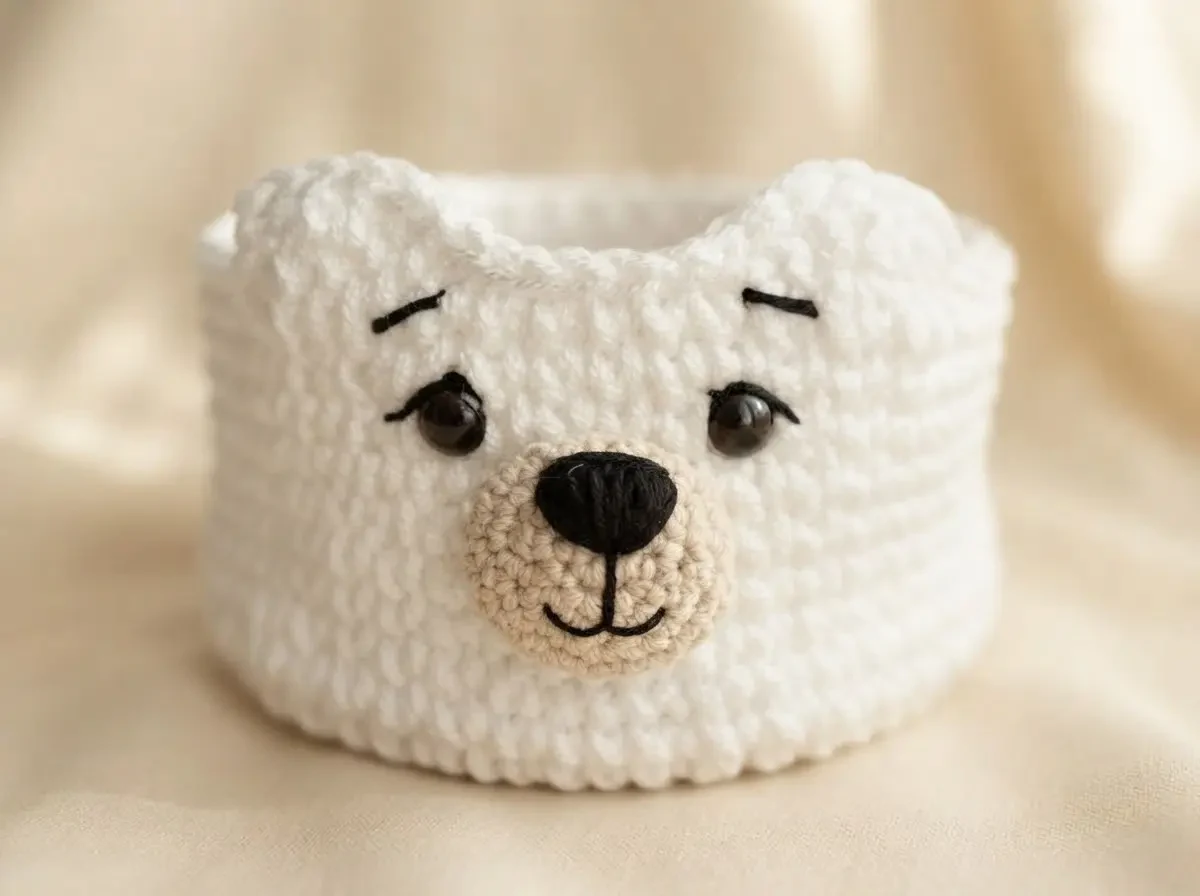
The bear expression works best when the details are simple and carefully positioned. Two small ears at the upper edge create the silhouette. A softly rounded muzzle anchors the face, while a dark nose, mouth, and eyes provide contrast against the white body.
Ears
Ears can be worked as separate pieces or integrated into an upper finishing section, depending on the original design. They should be balanced on either side of the front and secured so they don't pull the rim out of shape. Their decorative purpose does not make them carrying handles.
Muzzle
A small beige crocheted oval or rounded patch adds dimension. If a raised muzzle is desired, use only a modest amount of stuffing and make sure the shape does not block the yarn-feed opening. Place the muzzle temporarily before sewing to check the overall expression.
Eyes, Nose, and Mouth
Embroidery can create a clean face without rigid attachments. If plastic eyes are used, their suitability and security require special consideration; so-called safety eyes are not automatically safe for babies or young children. Keep the face symmetrical, but remember that tiny differences in placement can add personality.
A Sensible Assembly Order
Begin by preparing and inspecting the wooden base. Test your yarn and hook with the perimeter holes, then attach the initial crochet round and check its tension. Work the body until the intended height is reached, allowing for the planned yarn opening and rim finish.
Make the facial pieces separately where appropriate. Before sewing, place the ears and muzzle against the basket and check the proportions from the front and sides. Make sure the facial details do not distort the basket walls or interfere with yarn movement. Attach the elements securely, weave in loose ends, and inspect the underside of the base.
This is an assembly planning sequence, not a substitute for a tested pattern. A final row-by-row tutorial would require an original prototype, precise instructions, and verification that the finished piece matches the described result.
Helping the Basket Hold Its Shape
A rigid base is only one part of a stable basket. The sidewalls still depend on fabric density, yarn firmness, height, and how much weight is placed inside. A basket that stands neatly when empty may lean when filled with multiple heavy yarn cakes.
If the sides slump, review the yarn and hook combination before adding decoration. If the rim flares, examine stitch counts and tension near the top. If the basket tips, consider whether the contents are unevenly distributed or whether the base is too small for the height.
Keep the basket dry and clean according to the yarn and wooden-base care requirements. Do not soak an unfinished wooden base unless its manufacturer specifically permits it.
Common Mistakes to Avoid
Ignoring hole spacing
A stitch arrangement that works for one wooden base may not work for another. Test the actual base you own.
Working too tightly through the wood
Excessive tension can make the edge uneven or put stress on the holes.
Building walls without checking the profile
Small increases or decreases accumulate. Look at the basket from the side as you work.
Placing the yarn opening after the fact
Plan its position early so the finished opening is smooth and useful.
Attaching the face too soon
Pin or mark the placement first; then check symmetry and clearance around the opening.
Using loose or detachable details around young children
Treat the piece as a craft organizer, not a tested toy.
Styling and Everyday Use
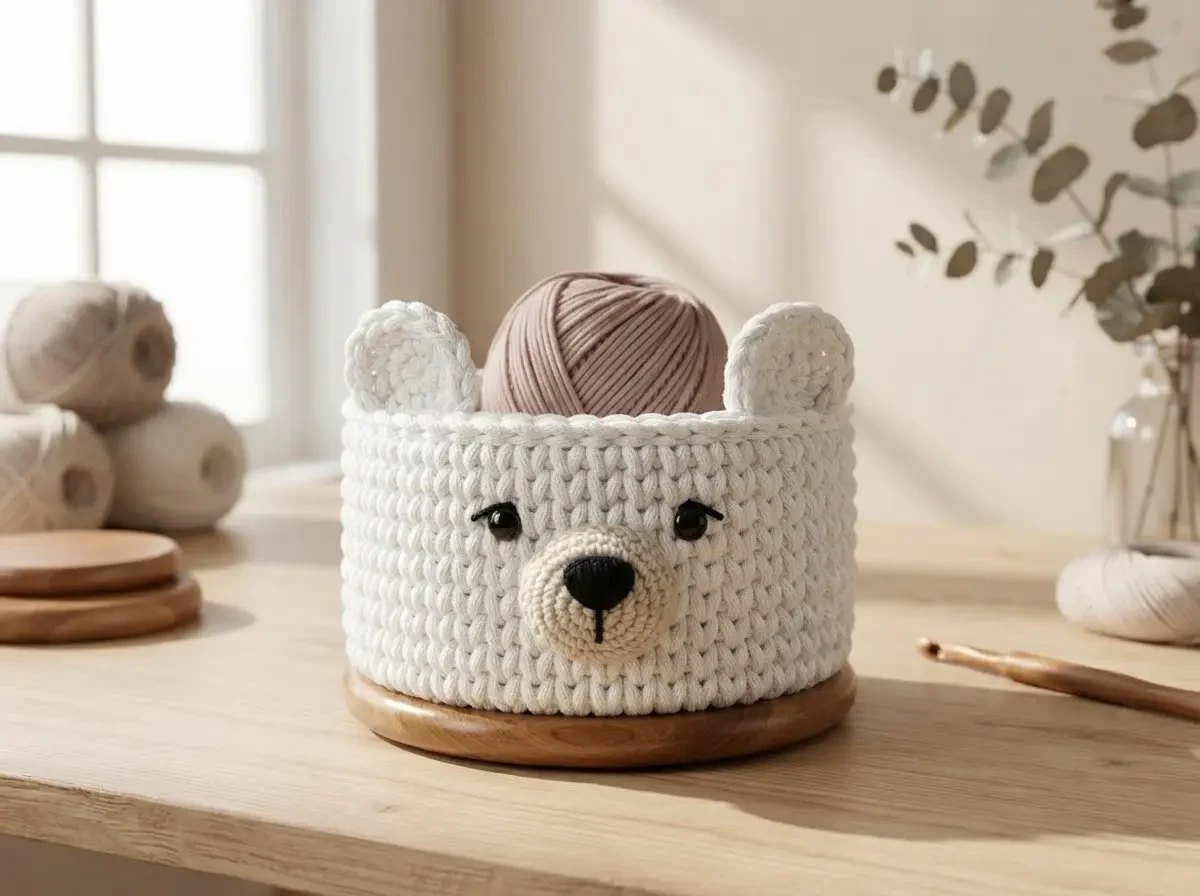
A bear yarn basket looks at home on a craft desk, beside a comfortable chair, or on a shelf among yarn and crochet books. White and oatmeal tones keep it calm and versatile, while a dusty-rose yarn ball adds a gentle accent. A wooden hook or a folded linen cloth can complete the scene without making it cluttered.
For everyday use, place the yarn inside, guide the strand through the opening if that suits your project, and keep the basket on a stable surface. If you switch yarn frequently, check that the opening does not make removal unnecessarily difficult.
Frequently Asked Questions
Is a wooden-base crochet basket suitable for beginners?
It may be approachable for crocheters comfortable with consistent stitches and working into unusual attachment points. Beginners should practice working through a few base holes before committing to a complete basket.
Do I need a base with exactly 36 holes?
No. The third-party reference identifies 36 holes on one particular base, but other bases may work with a differently planned first round. Do not reuse counts without testing.
What yarn should I use?
Choose a firm yarn or cord that passes comfortably through the base holes and produces stable sidewalls. Make a test section with your actual materials.
Can the basket hold more than one ball of yarn?
That depends on its size and structure. Test the finished basket with the intended contents; do not assume it is suitable for heavy loads.
Are the bear ears handles?
No. They are decorative unless an independently engineered and tested handle construction is used.
Is this a complete free crochet pattern?
No. This is a design, materials, and assembly guide. A full pattern would need original, verified stitch counts, shaping, measurements, and assembly instructions.
Final Thoughts
The charm of a crochet bear yarn basket comes from the meeting of a practical wooden foundation and soft, expressive details. A neat attachment round, consistent walls, a usable yarn opening, and a thoughtfully placed face matter far more than unnecessary complexity.
Use the ideas here to plan your own original design, test your materials, and build the skills needed for a reliable finished project. Explore CrochetSmith's existing stitch, yarn, hook, and home décor guides for additional support. If you liked this project, our guides to the crochet owl basket and crochet plant pot covers cover two more handmade pieces for the home.